My brother is better than yours…

…well it is true. I have the sweetest and most awesome brother who spoils me once and a while. He bought me fabric for my birthday that was in April. Not just any fabric a Fat Quarter bundle of 12 Anna Maria Horner Field Study prints! Plus some 1/2 yards of Amy Butler Alchemy prints. He loves me! I should really start on his quilt I plan on making him I have all the supplies…

Anyhow my FQ bundle came and I had to make something with it ASAP! I happened to buy some AMH Field Study yardage plus a Bari J print from her Splendor 1920 line that went perfectly for my birthday as part of my bday gift from my husband. So I had 13 prints to play with and went on a search for a pattern.

I found a pattern on Cluck, Cluck, Sew called Squares and Strips. A patchwork quilt! I have never done a 16 patch or a framed patch so I decided that this was perfect. Quick, easy, and something that I could use my FQ bundle with. Perfect!

_DP_6740

This top only took me a few days to complete but then I was on a stand still until I found the perfect thread to quilt with. Well I found it at the quilt show last weekend! Aurifil #5022 came to the rescue. I had brought my pouch that Miss L had made with me to color match.

IMG_20130623_140328

I quilted it with curves most of them with a curved frame excepted for the framed blocks those ones got an orange peel type petal. I used my walking foot and I didn’t mark where I was quilting so it is far from perfect but I am not too worried about it.

_DP_6755

I am in love with this quilt and I love the fact that there is a quilt in this house that finally belongs to me!!!!!!

With the yardage I even had enough for the backing and binding! This truly is a birthday fabric quilt!

Okay I will stop with the pictures already… Hope everyone has a great week!

linking to

Let’s Get Acquainted at Quilts in the Queue

Fresh Sewing Day at Lily’s Quilts

Fabric Tuesday at Quilt Story

Winner!

This morning random.org drew a name for my lovely pouch giveaway! And the winner is Stephanie from Spolgarquilts!!!!!!! Congrats! She has a lovely blog with great projects! PS she just made a Supertote… I really need to get a start on mine now that I have the fabrics!

Hope everyone is having a lovely weekend! I kind of stayed up very late last night quilting my Anna Maria Horner Field Study patchwork quilt…I will show it to you soon! But for now here is a sneak peek phone shot:

Have a great weekend everyone!!! And Happy Canada Day to my fellow Canadians!

Everyday Shopper Tote

My Dad asked me for a tote bag recently. He has started taking hot yoga and wanted something that a towel and yoga mat would fit in. (It is his birthday next weekend so I figured it was kind of perfect timing.) I decided that I could use my Amy Butler bag book again!

_DP_6673

I didn’t use interfacing, sshhhhh don’t tell Amy that I know she loves her interfacing. I was using a heavy denim plus I just didn’t have enough. I can see that if you want the tote to have more structure you would want to use interfacing but I think that my Dad will be happy with it either way.  After I finished sewing this bag my hands were blue from the denim! So this tote had a good wash after its beauty shots. I figured my Dad didn’t want to turn blue as he was using it!

_DP_6675

Next up I finished up this slab block. It is not perfect but I have never ever done a block like this before. Cheryl has organized a quilt block for us to make for the flood victims in Southern Alberta. There was major destruction and people lost so much. I had a sister in law and niece evacuated from their place. Luckily for them nothing got damaged but some weren’t so lucky.  If you have a moment and can make a 15.5” slab block that would be awesome! If every one just made one slab more quilts will be able to be made! We quilters know that there is nothing better than snuggling under a quilt!

_DP_6705

You can find more info over here at Dining Room Empire.

linking to finish it up friday at crazy mom quilts with Amanda Jean.

Tallahassee Basket

I am so happy that I finally get to share this on my blog! I sent this basket to my quilting buddy that is all the way in Australia. I picked the slower cheaper way of postage needless to say it was slow and took two months to get to her! I was starting to stress out a little since the post office said 4 to 6 weeks. Everything arrived safely so it is all good. Yay! Love you Brie!!!

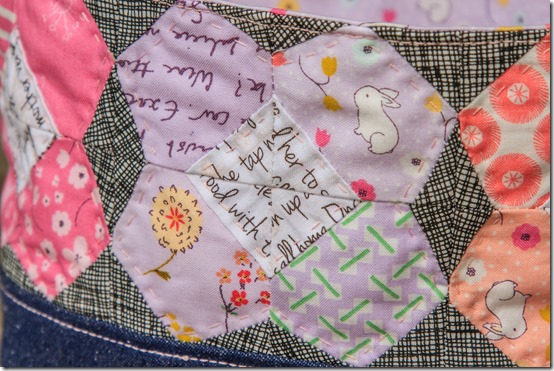
So here you have this beautiful fabric basket. I had bought a mini Posy charm pack which were the perfect size for this paper foundation block. Also  there happened to have six different colors for six different flowers! It is called the Tallahassee Block. I used this pattern here the 8” one. (although I think that I shrunk but I can’t remember how much.)

I followed Ayumi’s Tutorial over at Pink Penguin but made some size adjustments for the basket. Before I assembled the basket I went and practiced some hand quilting with some light pink 12 wt. thread.

You can see the super cute bunny lining inside! I will for sure make this block again. I love the flowers!

If you haven’t tried paper foundation piecing you should give it a go! I love it!

PS. If you haven’t seen my last post you might want to go check it out…

linking to fabric tuesday at Quilt Story

Pouch to Giveaway! It could be for you…

I couldn’t wait I have my post ready and decided to post it early! Are you ready to see the pouch that we have all been waiting for this past week?! Are you ready for a little GIVEAWAY! I am kind of excited but at the same time like all the pouches I make I want to keep it! This pouch was made from a pattern in the Amy Butler’s Style Stitches book. The pattern is called the Origami Pouch. I am impressed that I am actually making pouches from this book, lol. (You can see my other one here) Next I need to make a purse!

Anyhow, I used some beautiful Anna Maria Horner Linen for this pouch that I purchased like the second it was released. It is so soft and pretty! I paired it with the green Michael Miller Stitch Square print.

_DP_6666

The lining is a brown text print from the Word Play line.

_DP_6654

I really like this pattern and look forward to making some of the different sizes. There are five different sizes in the book. This one is size small. It measures at about 9” at the bottom, 12” at the top and about 3 1/2” wide where it is boxed. PS I forgot to sew on the tab I sure hope you forgive me…

So here it is you lovely people who read my blog or follow me on instagram! I have this pouch with a few other goodies thrown in. There is a couple zips with awesome tabs! An assortment of snaps (the magnetic one was forgotten in the picture.)  Some vintage glass buttons! Two fat eighths of Field Study prints. Now you could maybe start on a little pouch of your own!

_DP_6653

I also made this darling needle case and included some quilting needles. You can find this pattern on the luvinthemommyhood blog found in her tutorials section here. It even matches your pouch! The inside is a gray wool.

_DP_6655

I have really enjoyed making pouches in the past month or so. Thanks for following me on this journey. It is amazing what you can do if you just try! If you find zippers scary, which I did, all you have to do is practice! And trust me once you get it you will be so happy and proud of yourself!

Please only leave one comment per person perhaps tell me about something you are working on?! You don’t have to be following my blog but that would be nice. Comments will close on Friday at 12am PST. I will draw a winner randomly on Saturday June 29th. Good Luck! (Also please leave your email info if you are a non-reply blogger)

Zippy Wallet

Pouch number four of the week. Sorry if I am boring you… but I am getting my Pay It Forward projects done, only one more to go. Yay!

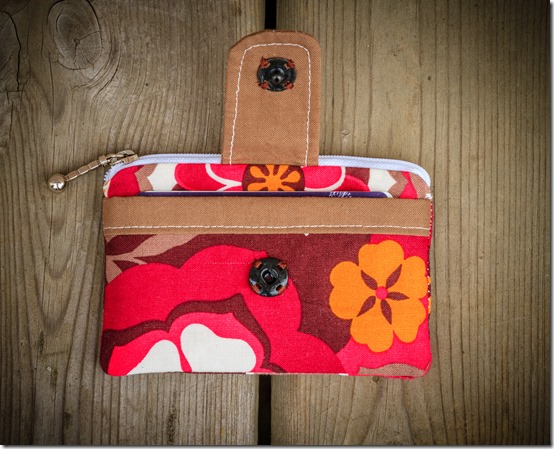
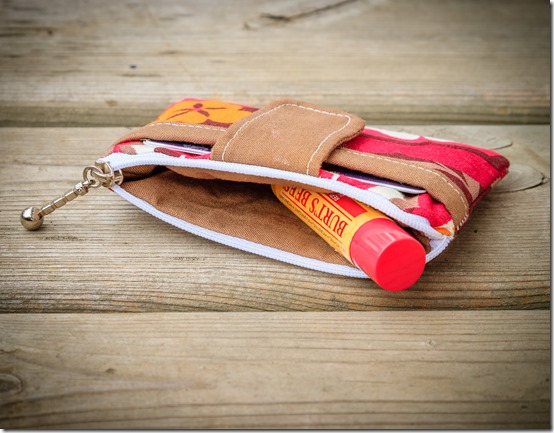
This is a little wallet/pouch is for your cards and of course I would put in some lip balm too. I asked my pay it forward person for ideas of things she wanted. (I know it was suppose to be a surprise but oh well. If you are reading this I hope you like it). She is my aunt and she lives on the other side of the country. I am in BC and she is in Newfoundland  I really didn’t want to send something that she didn’t want or need. I am still going to make her a drawstring bag for her knitting too because I love her and she has had a little too much stuff going on in her life right now.

I used this tutorial from Noodlehead by Anna. It is a great little tutorial like all of her other tutorials and patterns. (I still really need to make a super tote for a park/beach bag) I only had a black sew in snap to attach and I figured magnetics near cards wasn’t a great idea. I think that the size of the snap is great a smaller one would have been to little if you know what I mean!

It is kind of funny because the zipper in this pouch is one that my aunt bought locally at a liquidation center a few years ago and left at my moms when she moved. It is now going to make its way back to her!

(Sorry I am not too sure of the fabric of this pouch. My dear sewing buddy who lives in Australia left it here when she moved back to the Oz. I miss her! Speaking of which she finally received her package that I sent so I can finally share it with you guys! Although you will have to wait until next week sometime)

Linking to finish it up friday at crazy mom quilts

PS stop back on Monday to see what type of pouch I have made for one of my followers! That is right my first giveaway is happening!!!!

Magnetic snaps…

I installed my first magnetic snap a couple months ago when I made Miss L her lady bug 241 Tote. I was a little worried but everything went great expect for the cost of the magnetic snap, ouch. I decided that I would pre buy some more snaps for when I needed them again. This time I got 10 snaps from ebay for about the same amount I paid for the two at Fabricland if you live in Canada you know we all have a love hate relationship with that store. When the snaps arrived I was thrilled! I ordered thin ones so they are perfect for pouches too!

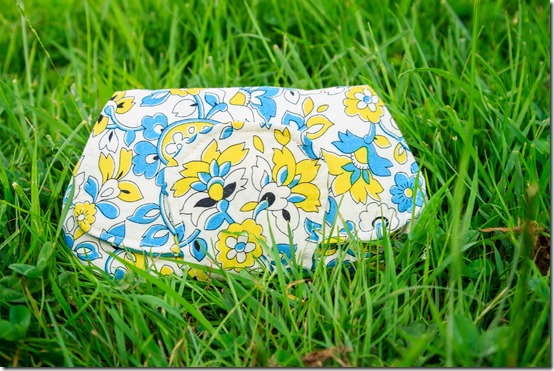
So here you have pouch number three! I made a pattern called the pocket clutch by Michelle Patterns. She has discontinued this pattern which is kind of sad. I really like how it turned out! By the way she does have some patterns in her shop that are similar.

I used my binding clips to sew all the layers together. They are such awesome little clips. Also if you pin in your zips you might want to consider using binding clips instead that way it won’t shift the zip as you pin and unpin.

I am glad that I now have a pouch in my purse for my lip balm and hand cream! Yes this one was for me. It was a little sloppy to giveaway well that is my excuse at least.

Btw the fabric I used here is from the awesome package I received from Pink Castle Fabrics. I had won their monthly giveaway back at the end of April and they sent me two lovely Fat Eighth bundles. Yay! Did you know that they have a link up every month on their blog? You can enter an item that you have made during that month that you have made with fabric from their shop to win fabric. How awesome is that?

IMG_1719

Back to Home Back to Top Making Life Prettier. Theme ligneous by pure-essence.net. Bloggerized by Chica Blogger.